Share this page


This exercise describes how to add steps to your test by dragging objects from the Toolbox pane on the left of the main UFT One window. The Toolbox pane is another convenient method of displaying all the objects associated with the action, and available for you to use.
This exercise requires that you've added the relevant object repositories and test objects to your test. For details, see Create object repositories.
Add steps to the SelectFlight action
This procedure describes how to add steps to the SelectFlight action from UFT One's Toolbox pane.
Do the following:
-
Start with the MyFlightApplication solution and MyFlight test open to the SelectFlight action, and the Keyword View displayed.
-
In the Toolbox pane, expand the Test Objects tree, and drag the
 object to the Item column in the Keyword View.
Tip: If the toolbox pane is not open, select View > Toolbox.
-
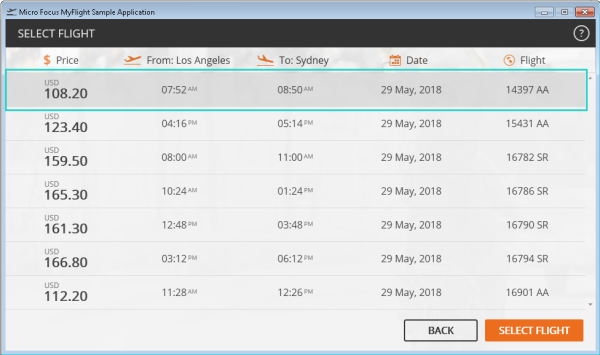
In the Keyword View, click in the Value cell and enter 0,0.
This tells UFT One to select the first item in the table, which is the first flight listed on the SELECT FLIGHT page.
 More about method arguments
The tooltip displayed as you enter the value indicates the arguments supported for this method. The bolded item indicates the attribute you're currently editing. Attribute values are separated by commas.
In this example, you are setting row and column values in a grid.

-
Add another step from the Toolbox pane to click the SELECT FLIGHT button at the bottom right of the page. This will continue with the flight reservation.
From the Toolbox pane, drag the
 to the next row in the Item column of the Keyword View. If you see multiple options, use the SELECT FLIGHT WpfButton, not the WpfObject.
A new step is added to your action, with the default Click method listed in the Operation column.
-
Save your test, and continue with one of the following:
- Basic. Add steps using the Step Generator
- Advanced. Add steps in the Editor


View your steps in the Keyword View
In the Keyword View, the SelectFlight action should look like this:

View your steps in the Editor
In the Editor, the SelectFlight action should look like this:
WpfWindow("Micro Focus MyFlight Sample").WpfTable("flightsDataGrid").SelectCell "0", "0"
WpfWindow("Micro Focus MyFlight Sample").WpfObject("SELECT FLIGHT").Click
 Next steps: